If you run a business, you need a Facebook business page to promote business. With billions of active users every day, Facebook is not just a social network. It’s a powerful platform that gives businesses a free opportunity to increase brand awareness and generate sales on Facebook. That’s probably why more than 200 million businesses use Facebook’s free services. Facebook includes business pages, creating a Facebook page is a free way to market your business. The good news is that creating a Facebook account for business is easy, and you already have all the tools you need to get started. Let’s see how to create a Facebook business page.
What is Facebook Business Page?

A Facebook business page is a public-facing Facebook account that allows international brands, organizations, artists, local businesses, and public figures to interact with Facebook users. By creating a Facebook page for your business, you will be able to share business information like post content, share important business updates, promote events and new products, and more importantly, you can connect with their Facebook audience
Why Do You Need to Create Facebook Page?

A Facebook business page is one of the powerful ways to promote your business, communicate directly with the target audience, gain followings and generate sales for your business. It is the best place for your customers, prospects, and fans to share reviews, opinions, voice concerns, and feedback. A Facebook Business Page will also allow you to link to Facebook Ad Accounts and Facebook Shops which is a fantastic tool for expanding your business, and Facebook’s extensive advertising network.
How To Create a Facebook Business Page?
In this article, we will share the complete method how to create a Facebook business page. A Facebook business page is very simple and easy to create, follow the steps that are given below to create your Facebook business page.
1. Login Into Facebook:
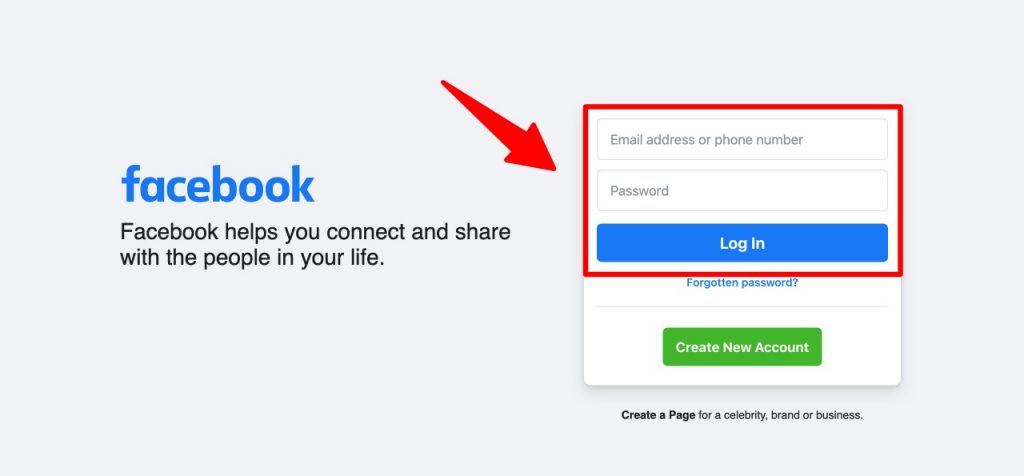
Before creating your Facebook business page, you need to log in to your personal Facebook account, because the Facebook business page is created by using your personal Facebook account. So, go to the Facebook website and log in to your Facebook account with your phone number or email address and password.
2. Create Facebook Business Page:
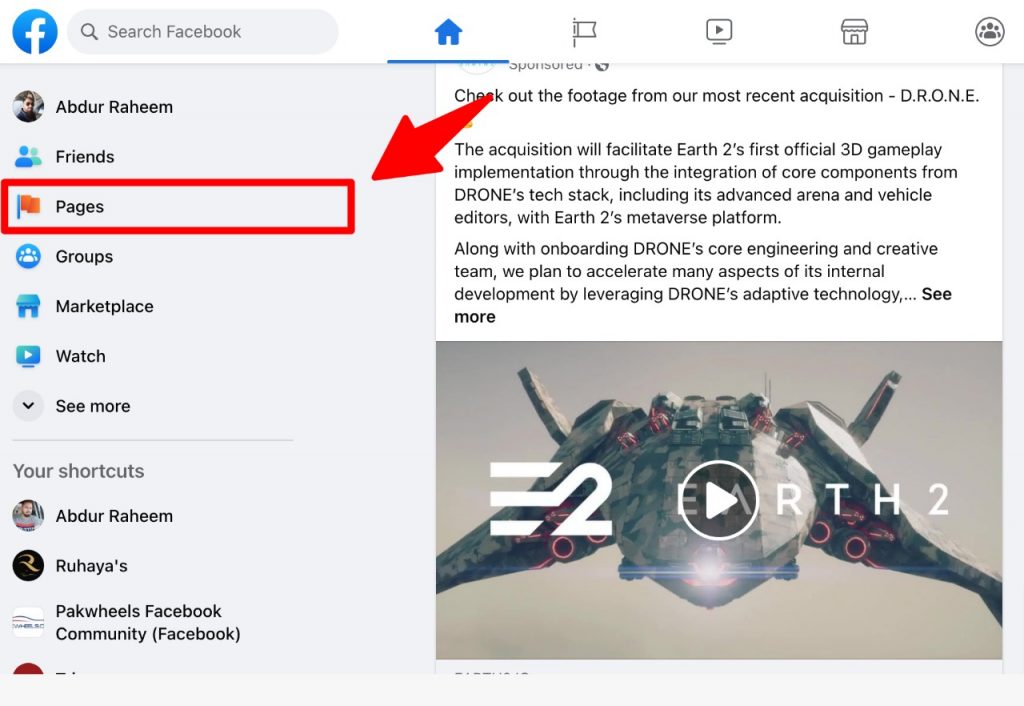
When you have successfully logged in to your Facebook account, then to create a Facebook page find and click on the menu button on the right-hand side of the toolbar. Next click on the pages in the left-side menu of the homepage’s sidebar.
Click on Create New Page:
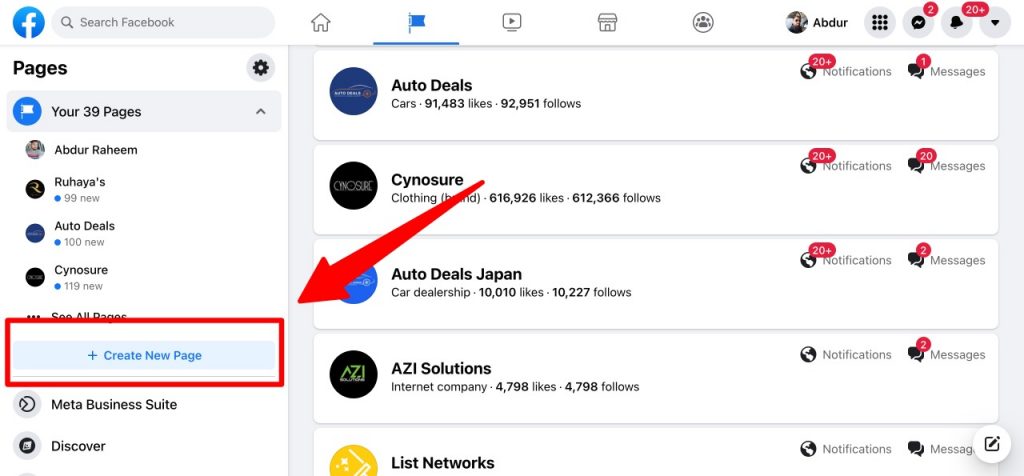
Then click on the “Create new page” in the menu on the left side. When you click on this, you can see, that this will be the structure of your Facebook page.
When the structure of a Facebook page opens in front of you, you need to enter the details on the page information about your business.
Enter page Information:
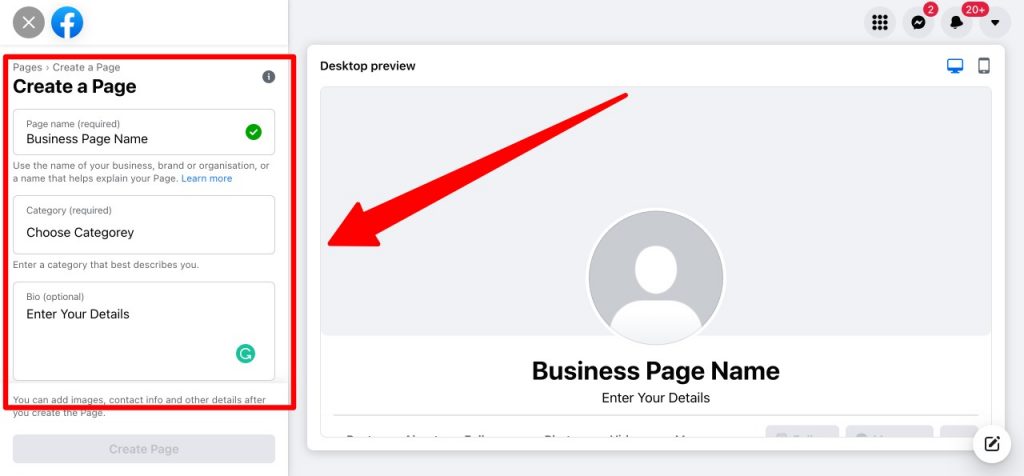
Here, enters your page name, then enter the category of your business, you can add up to three categories, and at last, you need to write a description about your business.
When you have entered all page information then scroll down and click on “create page”
3. Upload Profile and Cover Photo:
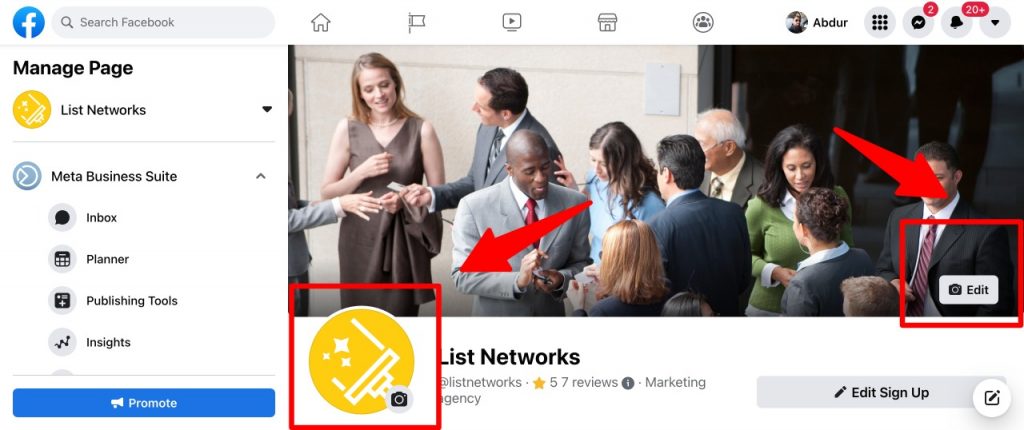
Once you have created the page, you can see that a new section appears here, where you can add images to your page.
First, upload your page profile picture by clicking on the “add profile picture”. You can select the image you want from your device.
When the profile photo is uploaded, then click “Add cover photo” and upload the cover photo of your page from the device. Then click on the “Save” button at the bottom.
4. Edit Facebook Page Info:
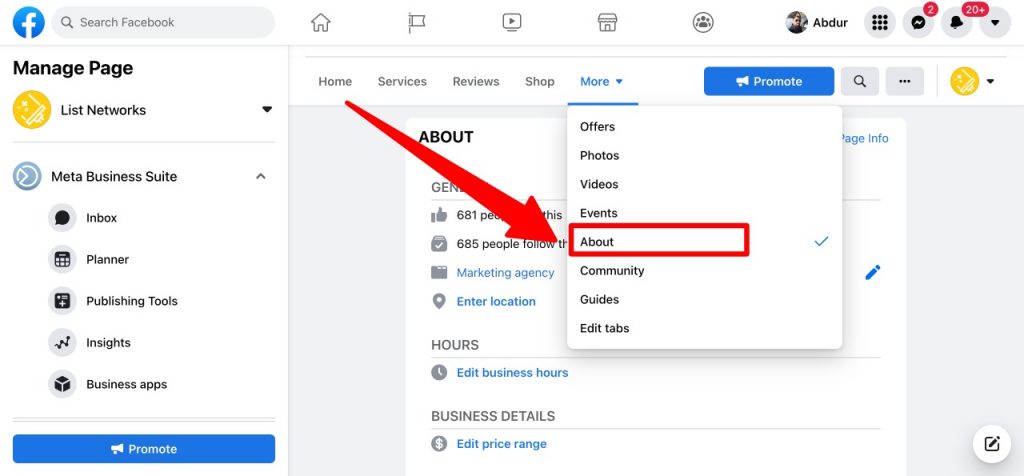
When you’ve created a Facebook business page and added a couple of pictures. Then a new section opens here and now it’s time to add a few more details about your business information. This makes it simple for potential clients to identify your business’s location, website, phone number, business hours, etc.
At this step click the “Edit page info” and enter the contact detail by adding the contact number, email address, and website link. Next, you can add the location of your business on the Facebook page. After that display the working hours of your business. Here you can also add your Instagram and Twitter pages.
5. Add Action Button:
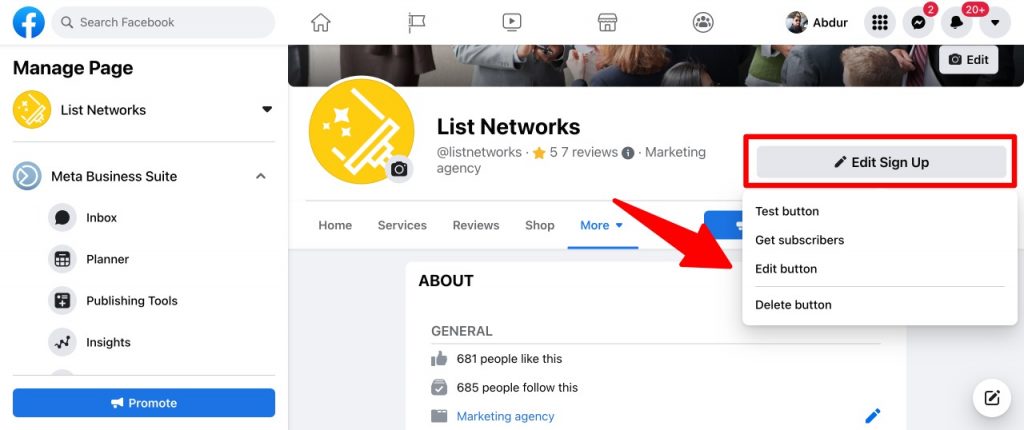
Once you have input all of your important information into your Facebook business page, the next step is to add a button to your page. This button will appear in the top right-hand of your business page below your cover photo. This serves as the free call-to-action (CTA) on your Facebook page. You can add relevance to your business that can help to generate more leads, which can enhance revenue. To add this, click on the “Add a button” option on the right-hand side of your Facebook business page. You can see a list of buttons you can choose related to your business.
6. Create your Username:
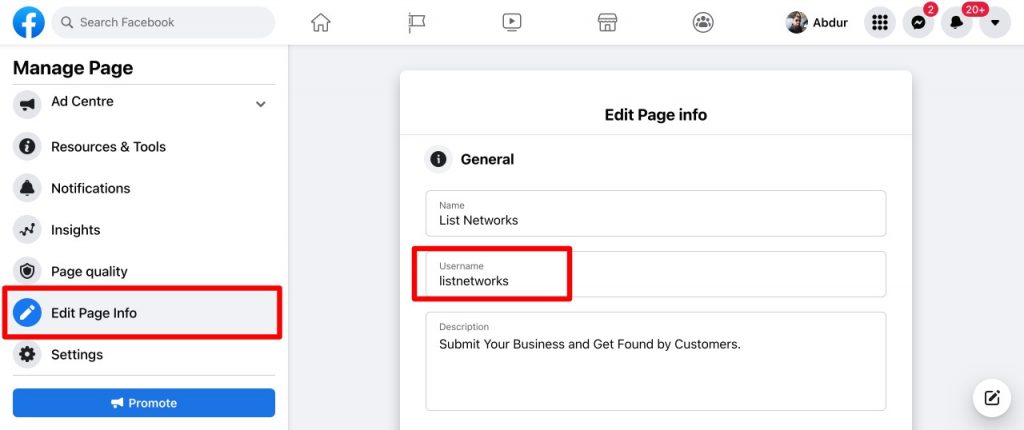
After creating the Facebook business page, now you will want to create your username which is commonly known as your vanity URL. You can direct people to your Facebook profile by using your username. You are allowed up to 50 characters for your username, you need it to be easy to type and easy to remember. Your business name or a clear version of it is a good idea for this. To create the username, click “Username” on the page preview to create your username.
7. Make Your First Post:
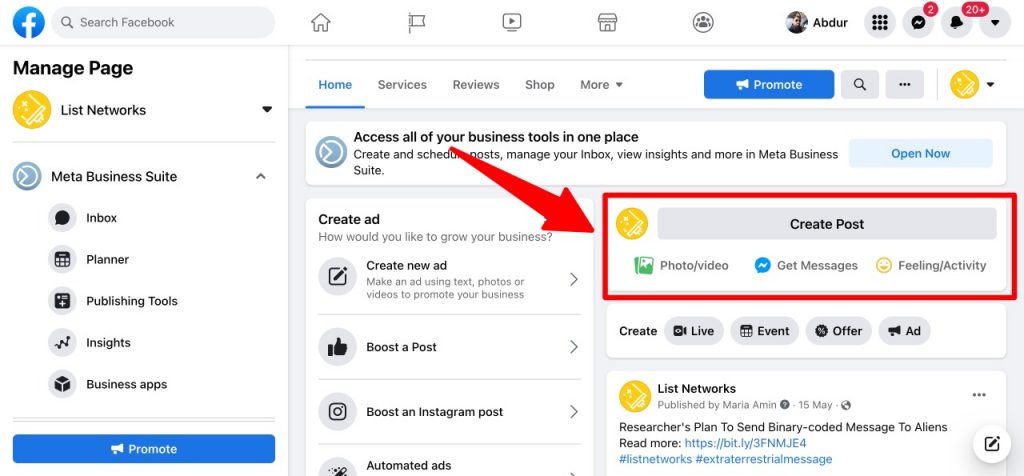
when Facebook business Page has done, before you invite your audience to follow you on the platform, take a few minutes to share the post on your Facebook page. You can share a welcome post, or information about your business, why people should follow your page, and the kinds of content you plan to publish. You can also share pictures of your team building products, performing services, and much more. You need to make your Facebook page a valuable source of information by sharing links to interesting blog posts and keep posting these kinds of things on a regular basis.
8. Pin The Post:
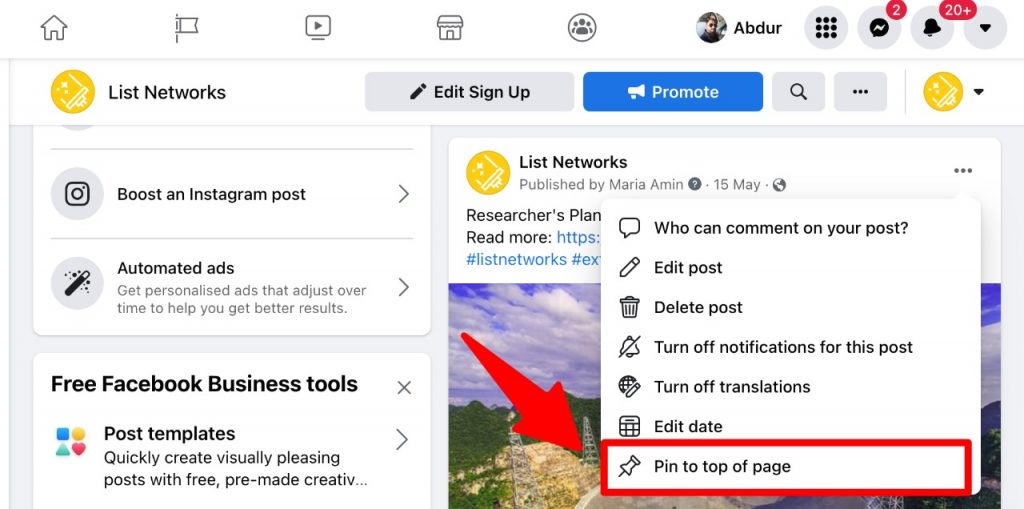
Facebook gives Facebook page owners the option to pin a post to the top of their Pages for easy access. Even when you publish new material, the pinned post will remain there to call attention to important announcements, limited-time offers, etc. Make sure the post you pin is one that promotes your business because you can anticipate it receiving a lot of activity such as likes, comments, and views. Click the three dots in the top right corner of a post to “pin” it. After that, you need to click on the “Pin to top of the page” option from the menu. Until you unpin it, this post will stay at the top of your Page.
9. Invite Audience:
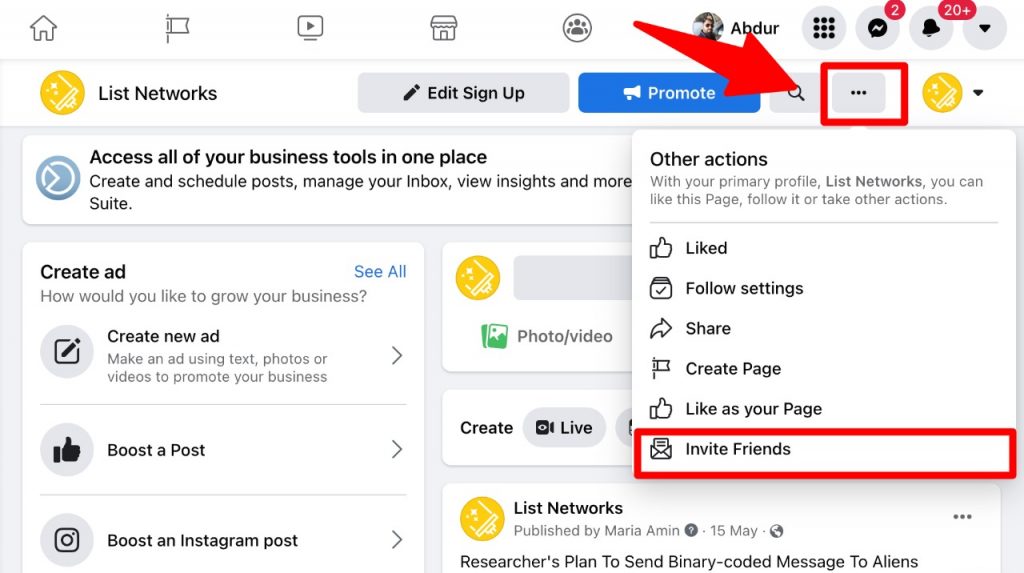
when your Facebook page is filled with content, now it’s time to share your Facebook Business Page with the world. Get started by inviting your Facebook friends to like and follow your new Page. To invite friends, click on the three dots in the top right-hand of your business page below your cover photo, find the section and click on “invite friends”. Then follow the pop-up menu’s three-step instructions. Share a link to your Facebook Business Page with friends and ask them to follow it, which can help to promote your Facebook business page.
10. Market Facebook Business page by Active on Facebook:

Making a Facebook business page is the first step in using Facebook marketing for your business. The second and more important step is to promote your business’s Facebook page. You need to be active on Facebook to market your Facebook business page and increase your audience. It means you need to be consistent in posting on your page and you should also actively participate in groups where your target audience is likely to hang out.


